Orthographic Drawing
1. "Ortho" in Greek means...straight, upright, perpendicular.
An orthographic drawing is a series of 2-D drawings that represent a 3-D shape. The series of drawings show different faces of the solid as a separate drawing.
2. When you arrange the front, top, side drawings on a paper on a paper so that the lengths, widths, and heights all line up, this is called an orthographic projection.
In orthographic projections, the same scale is used for all three views and they are aligned horizontally and vertically.
"Hidden" edges are often shown with dotted lines. (see examples at the bottom of the page).
Orthographic drawings/projections are usually made on perpendicular graph paper. Like this
3. Iso in Greek means...same, similar, equal, alike.
(Think isosceles.)
An isometric drawing is made from the perspective of the corner edge of the shape. It's made this way so that the angles are the same.
4. Here's an example of an isometric drawing.
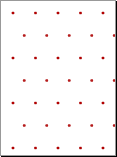
5. Isometric drawings/projections are often made on isometric graph paper. Like this:
6. Often in engineering, a solid is represented with BOTH orthographic and isometric projections on one piece of paper.
The dimensions in this kind of drawing are labeled!
(see examples below).
7. YOUR ASSIGNMENT:
A. Create a drawing/projection that contains a front, top, and side orthographic projection and an isometric drawing.
Please include dimensions. You will be given a shape to draw.
Due at the end of class on Friday, May 30. Worth 20 points.
B. On your own, review Chapters 4-6. Quiz on Monday, June 2.


GOOD
ReplyDelete